When third party controls/custom solutions need Session State in SharePoint Farm, how to enable it?
ASP.NET Session state is disabled by default in SharePoint 2010 installation. However, there may be need in custom solutions, web parts & third party tools like Telerik reports on top of SharePoint 2010 framework where persisting information per user session is required. This is a case study we have done for our project referring below mentioned blog.
ASP.NET Session State implementation in SharePoint?
As many of you are aware, ASP.NET allows persisting session states in three different ways.
- On server memory as a InProc
- On SQL Server to persist session in database
- On Session State Server to persist session on dedicated server memory.
Both SQL Server Session State Server would support server farm environment.
Since SharePoint is the multi-server farm environment based on ASP.NET framework, by default, it can be enabled to use SQL Server and SqlSessionStateStore provider to persist session state using ASP.NET Session State Service Application.
How do I enable ASP.NET Session State in SharePoint?
ASP.NET Session state is available to the SharePoint environment by enabling “SharePoint Server ASP.NET Session State Service” service application on the SharePoint farm. You can’t enable this service application using central administration browser interface. You must enable it using PowerShell command.
Step 1: Enable ASP.NET Session State Service
To enable ASP.NET session state, log on the Central Admin Server using Farm Admin Account
Run PowerShell command
Add-PSSnapin Microsoft.SharePoint.PowerShell -erroraction SilentlyContinue
Enable-SPSessionStateService –DefaultProvision
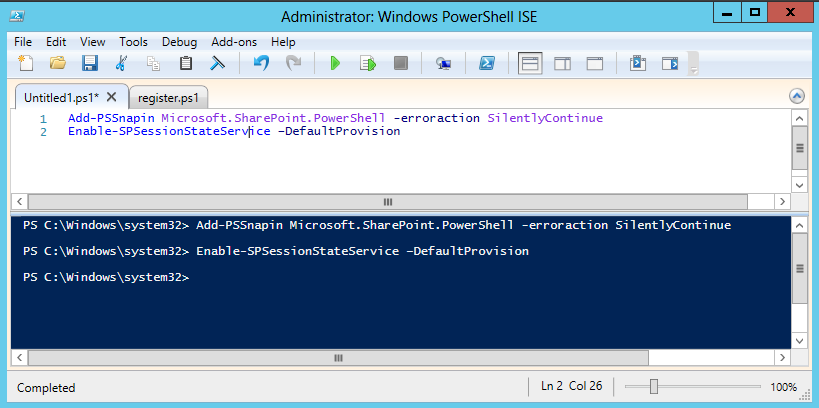
Creates service application with default state. By default, this will create service application database with “SessionStateService_<GUID>”, on the same database server where farm configuration database is located using windows credentials of the logged in user.
Run PowerShell command
“Enable-SPSessionStateService -DatabaseServer YourDBServerName -DatabaseName YourDBName”
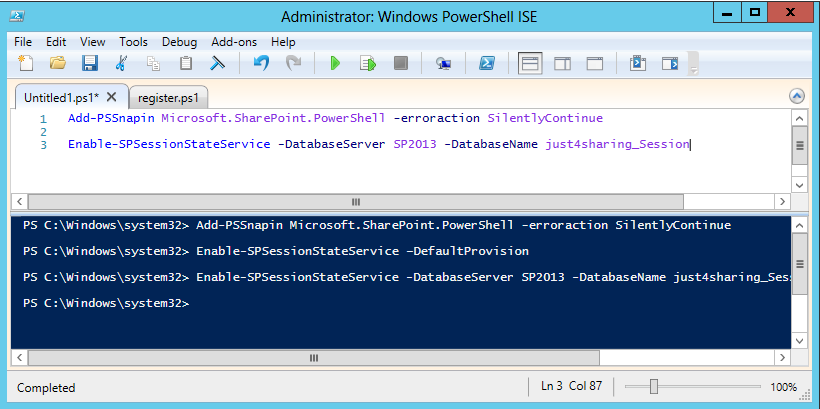
Creates service application with specific database name on non-SharePoint configuration database server. By enabling Session State Service on your farm, it would create database on specified server – SessionStateService_<GUID>

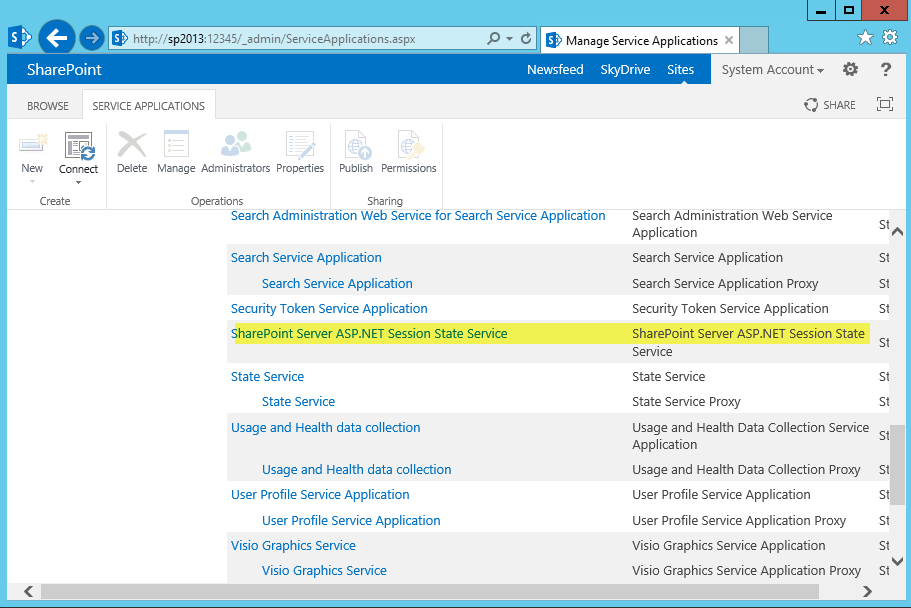
It would create SharePoint Server ASP.NET Session State Service in Manage Service Applications
It would add module in all web applications on farm
<add name=”Session” type=”System.Web.SessionState.SessionStateModule” />

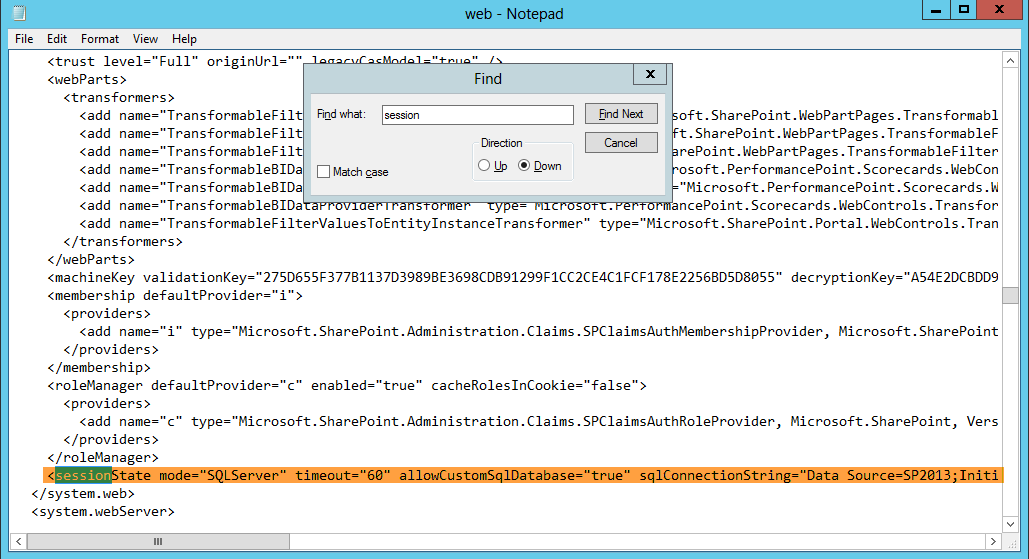
It would add sessionstate entry in all web applications on farm
<sessionState mode=”SQLServer” timeout=”60″ allowCustomSqlDatabase=”true” sqlConnectionString=”Data Source=SP2010VM;Initial Catalog=SessionStateService_1079ab25364440b0b38b15ad2392b6d0;Integrated Security=True;Enlist=False;Connect Timeout=15″ />
Step 2: Activate ASP.NET Session State on SharePoint Web Application
By enabling ASP.NET session state service in the SharePoint farm, every SharePoint web application in the farm ready to use ASP.NET session framework. To ensure SharePoint web application gets activated to persist ASP.NET sessions, you have to manually update Web.Config file for the specific SharePoint web application on all servers in the farm.

<pages enableSessionState=”true”

How would you use ASP.NET Session State Service in Code?
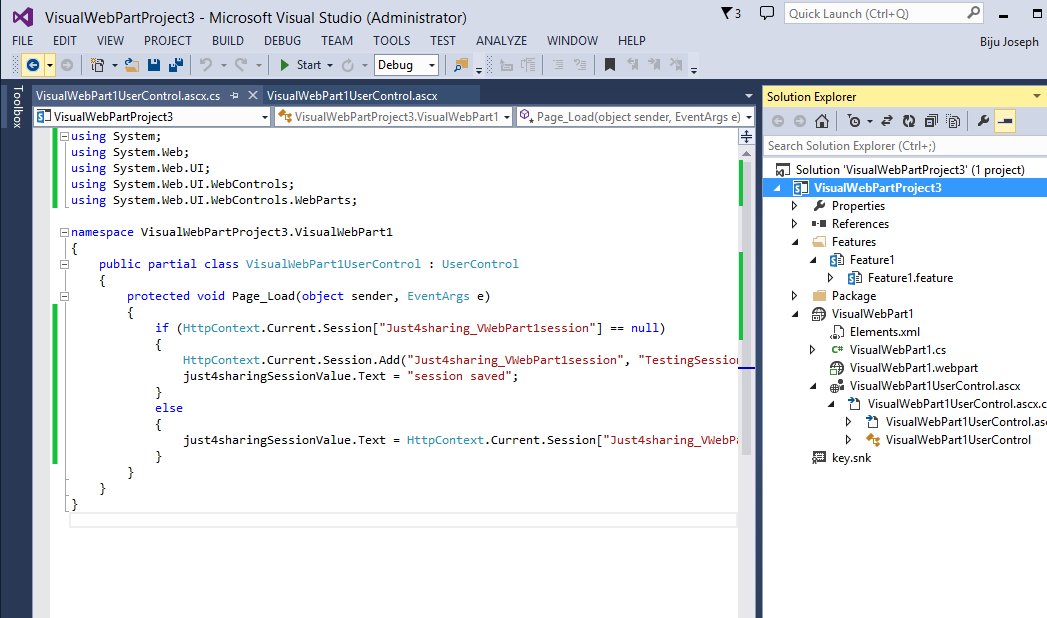
You can access ASP.NET session state object using HTTPConext.Current.Session and use the ASP.NET session state same as typicallyASP.NET Session Management. Here is the sample code which would create newASP.NET session object called “Just4sharing_VWebPart1session”, if it doesn’t exists. Let us create a Visual web part in SharePoint and add code to add session.
Step 1: Create a new SharePoint 2013 web part project

Step 2: In page load add code to save session key as seen in the code.
Step 3: Deploy solution and add web part to your site

Step 4: Save and refresh the page

After above code runs, this is what you would see in the ASP.NET Session State Service Application database.
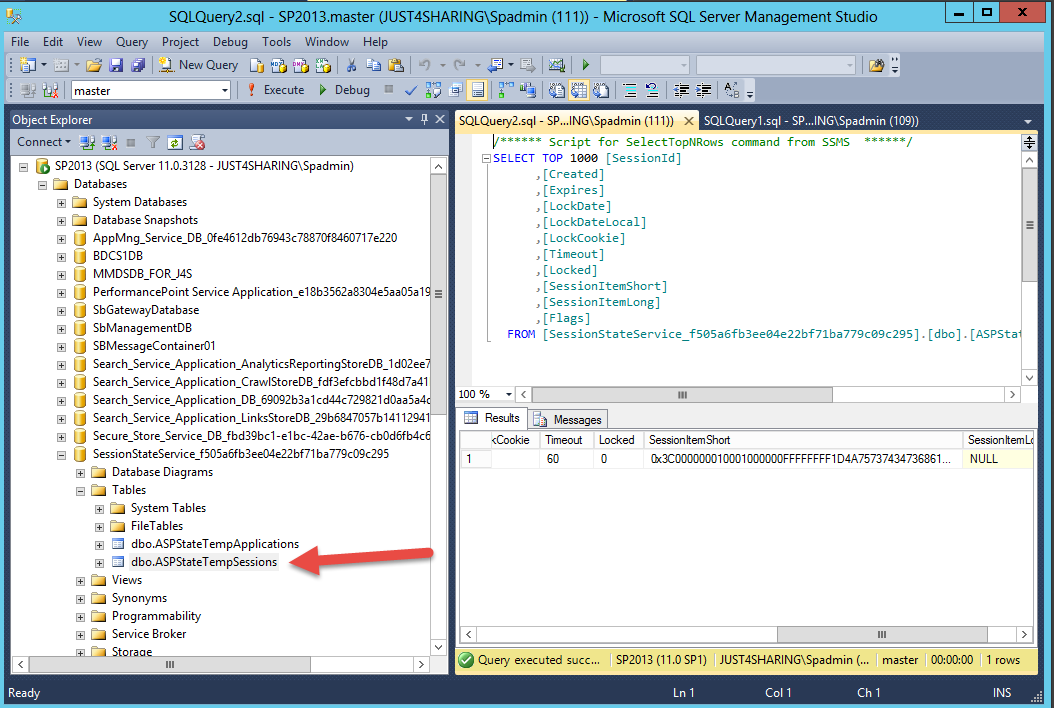
By default, it would create session for 60 minutes. If you want to increase or decrease session expiration, you have to pass “SessionTimeout” parameter while creating ASP.NET Session State Service using Enable-SPSessionStateService command.
Happy coding!
No comments:
Post a Comment