This is a two part Post where I will explain how to configure Windows Azure Access Control Services and Facebook authentication in SharePoint 2013. To achieve this we need to set up
- One Facebook Application
- Adding a Windows Azure Access Control Service
- Adding the Certificate & Manage Trust in SharePoint
- Registering custom ACS in SharePoint using PowerShell
Step by step walk-through follows:
Step 1: Create your Facebook Application
1.2. Create a new application
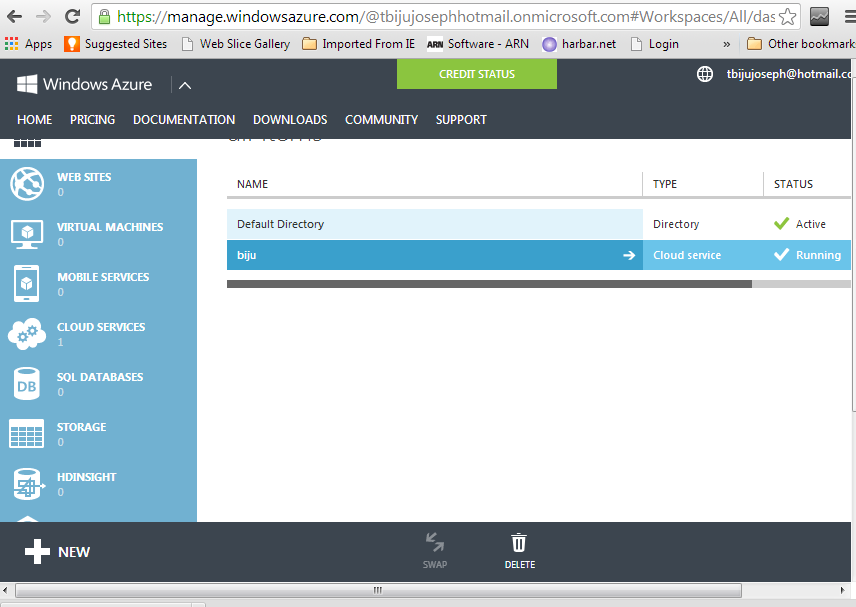
Step 2: Create an Access Control Service in Windows Azure
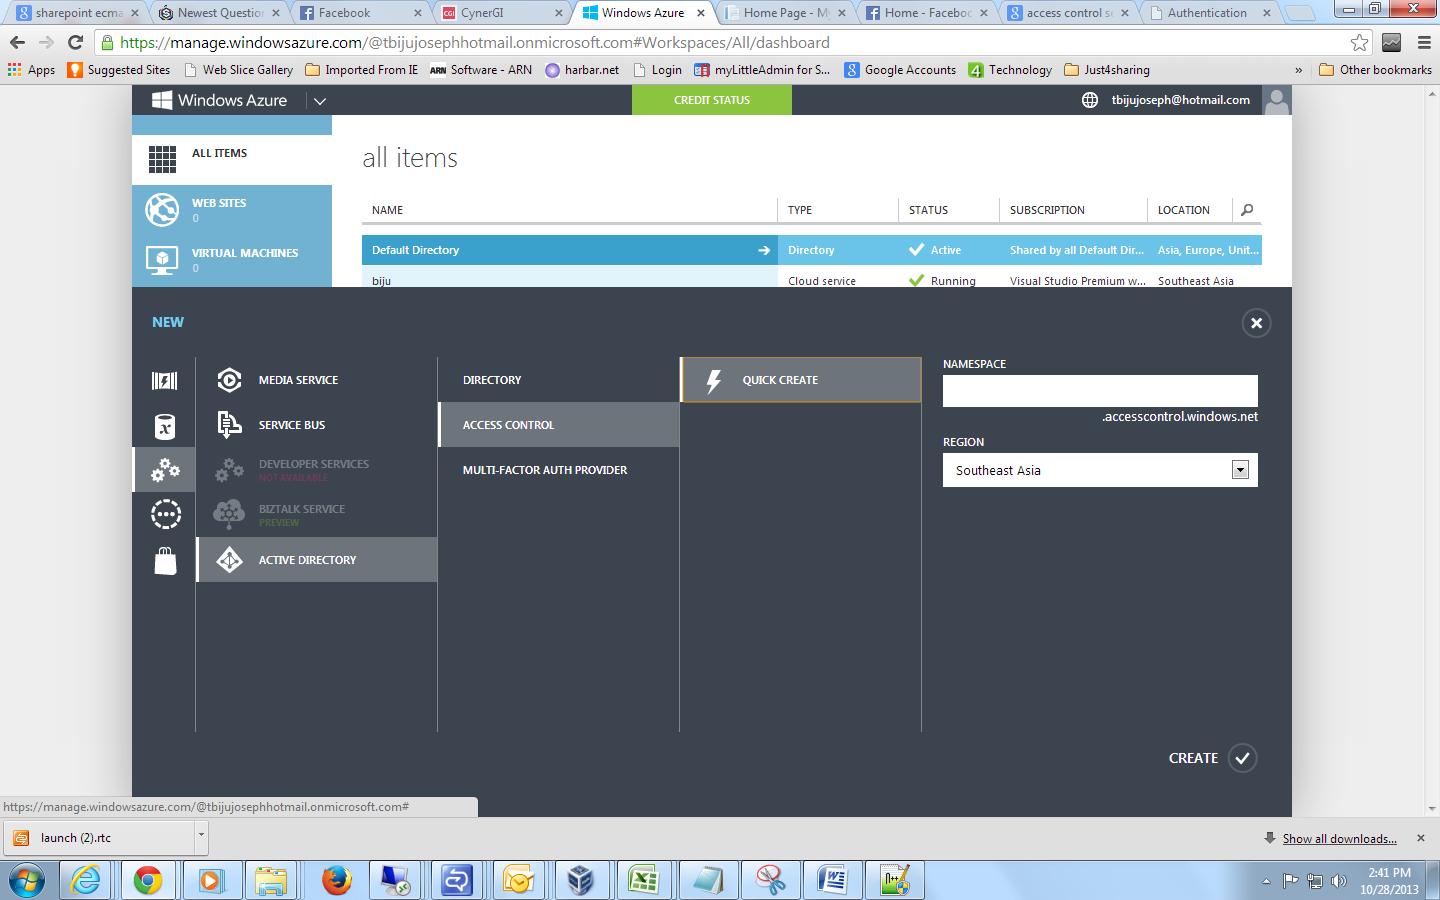
2.2. Click on “New” => Active Directory => Access Control => Quick Create
2.3. New Access control creation complete and need to be configured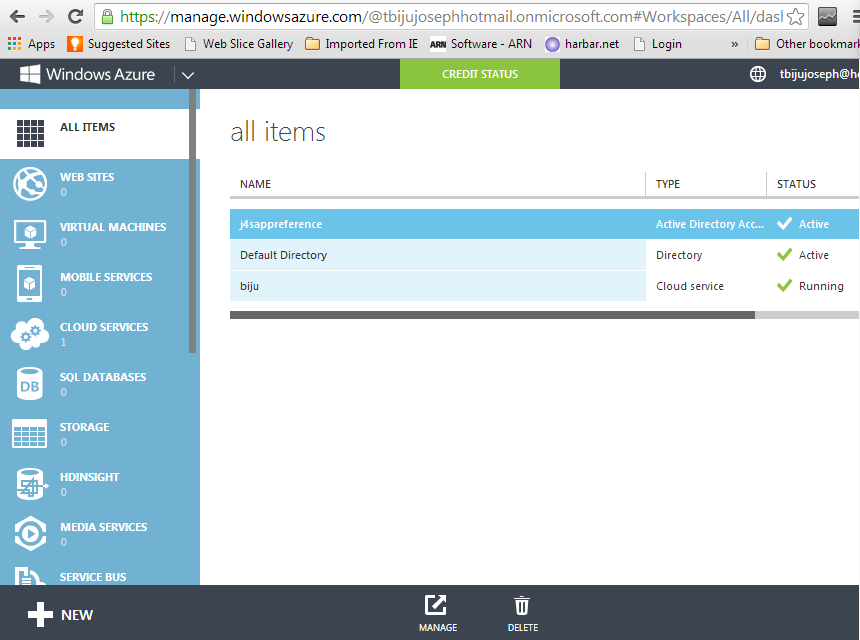

2.4. Click on the access control which is just created (update this URL in the Facebook page for “website with Facebook login” field). In my case the URL is:
https://j4sappreference.accesscontrol.windows.net/ now, we will set up Identity Provider, Relying party application, Rule groups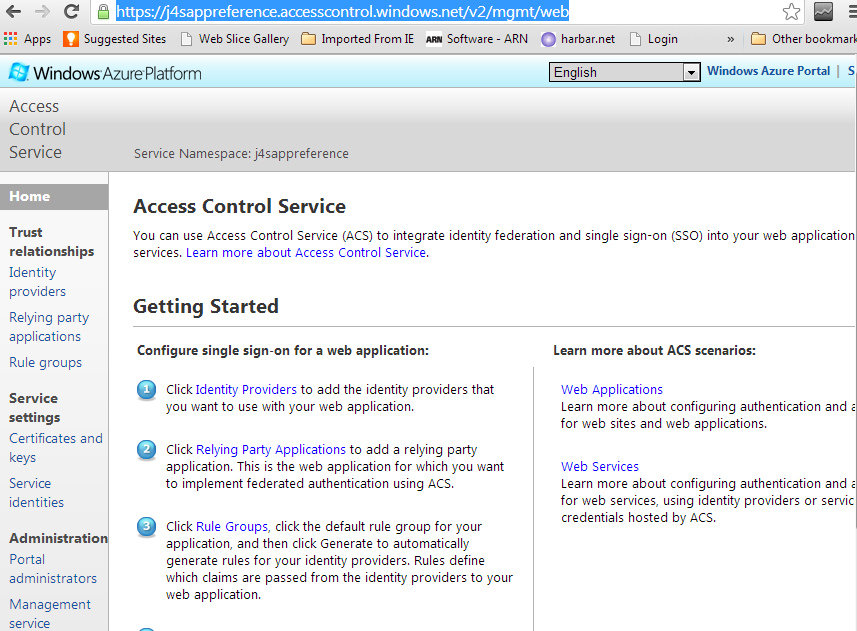
2.5. Setting up Identity provider. Identity provider is Facebook and you need to supply your
Facebook application details in the Identity provider Interface. My sample page is given below
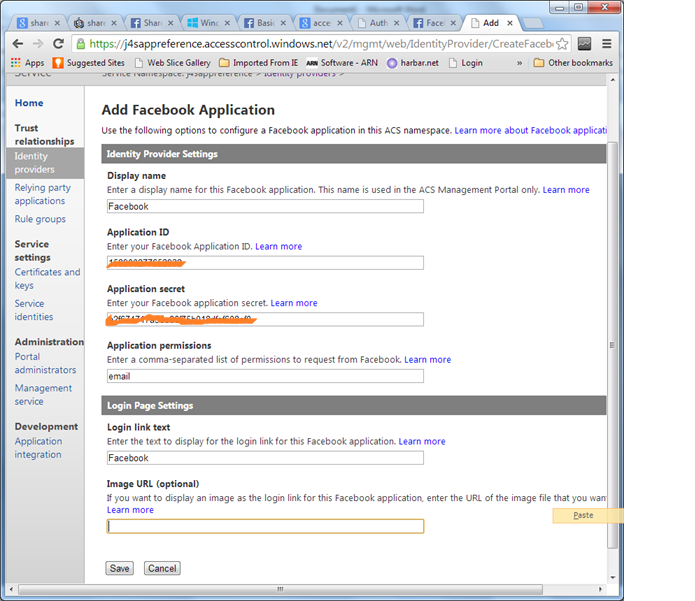
2.6. Click on save button. Facebook Identity provider is added successfully. You will see that windows live account is there by default.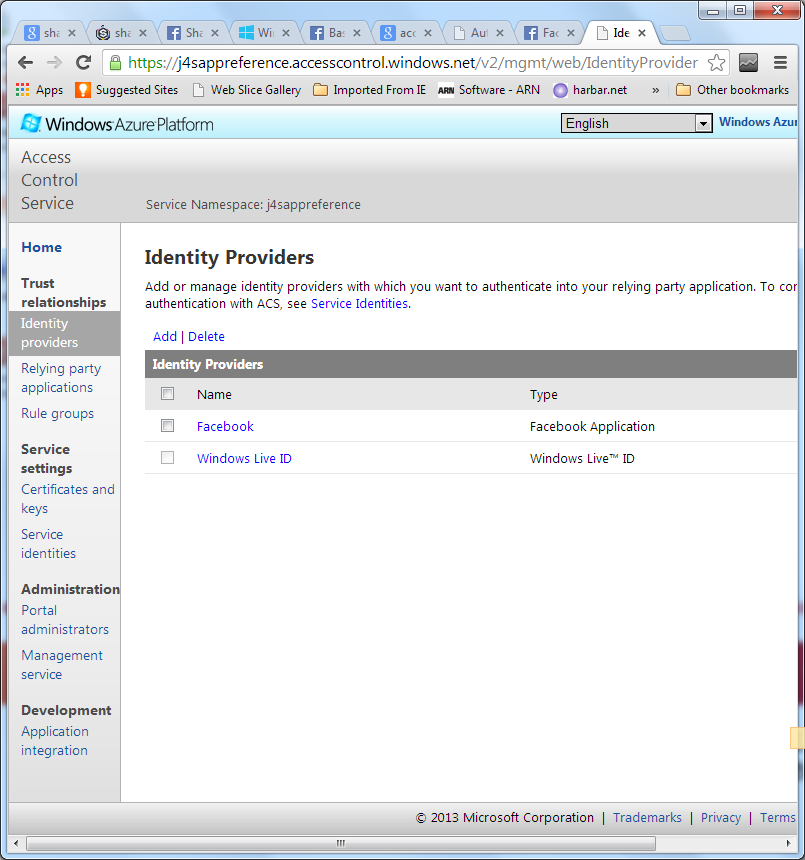
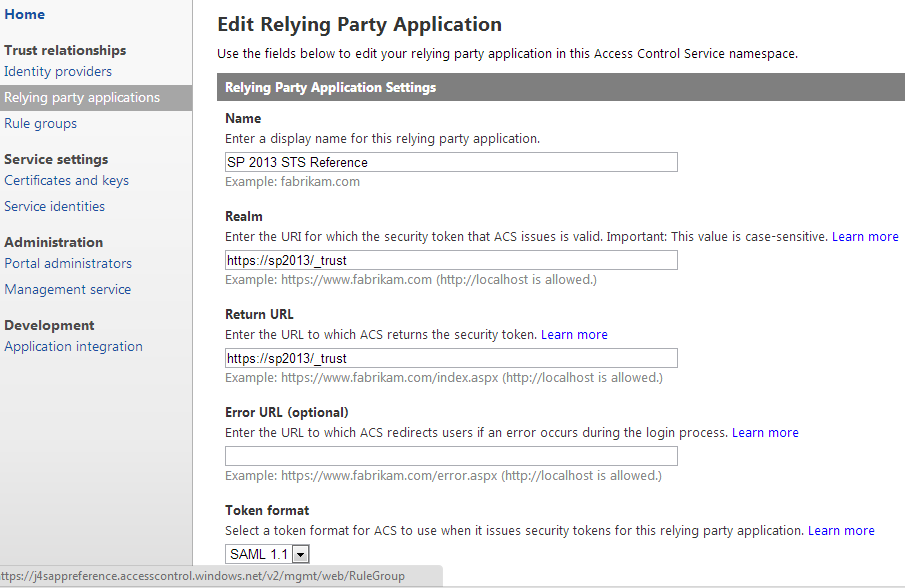
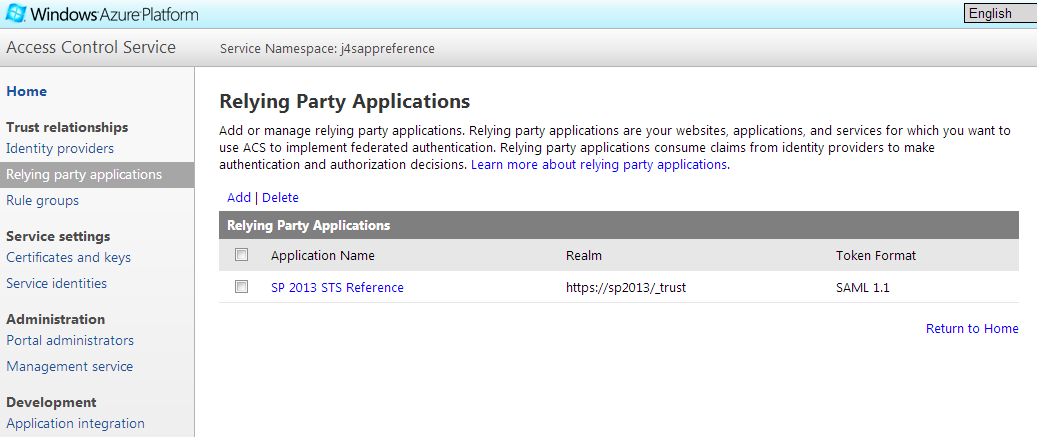
2.7. Setting Relying party and the relaying party is SharePoint. Screen shorts are self-explanatory. However note these points
- Token Format: SAML 1.1
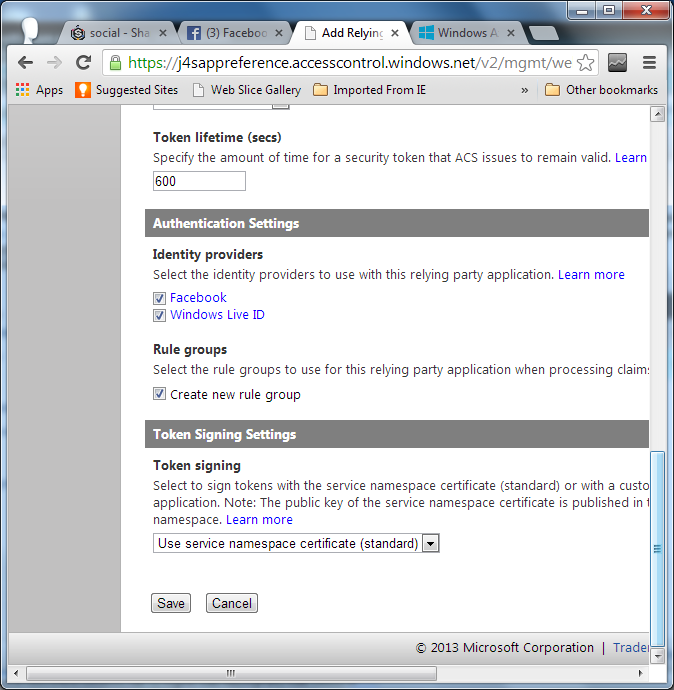
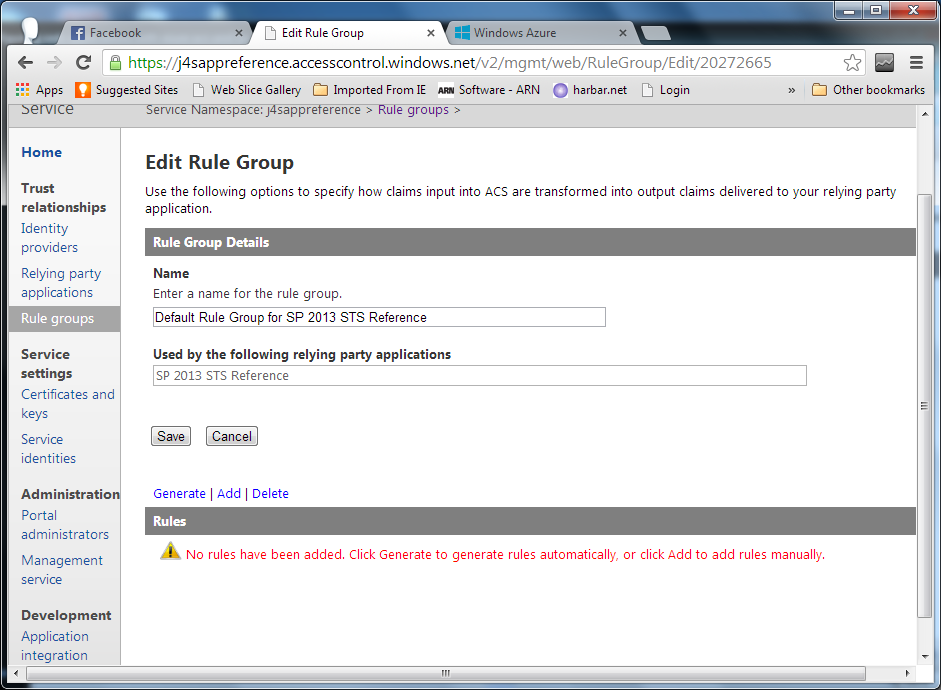
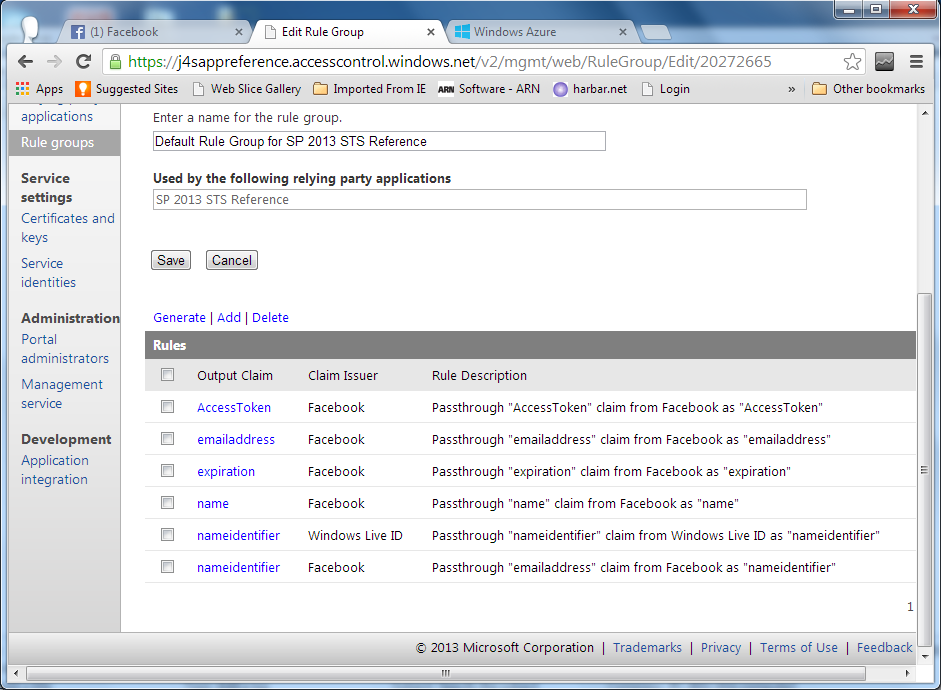
2.8. Setting Rule Groups. Double click on “Default rule Group for SP 2013 STS Reference”

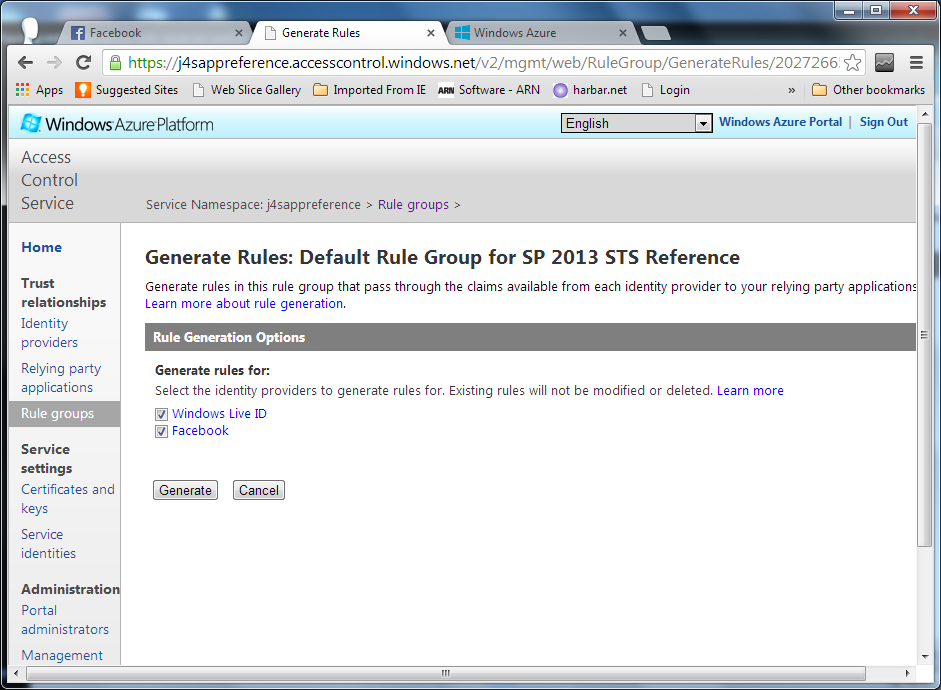
2.9. Click on “Generate”
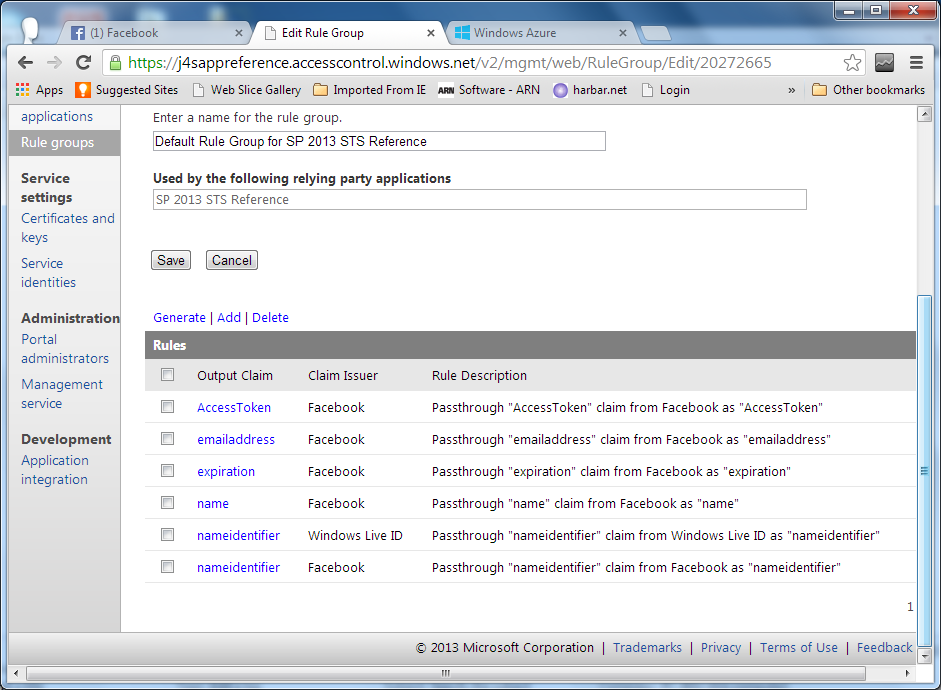
2.10. These are the generated rules
2.11. Need to change the input claim type “nameidentifier” to email id so that we get passthrough “emailed” claim from Facebook as “nameidentifier”
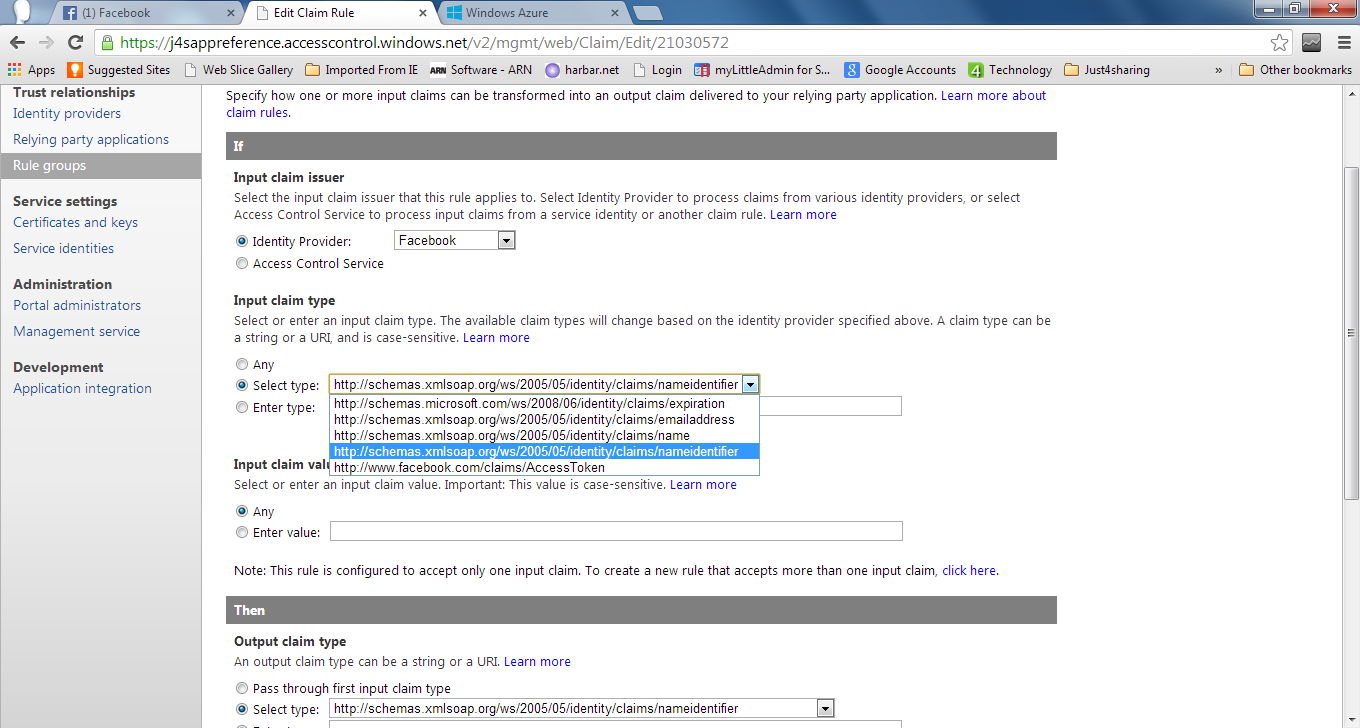
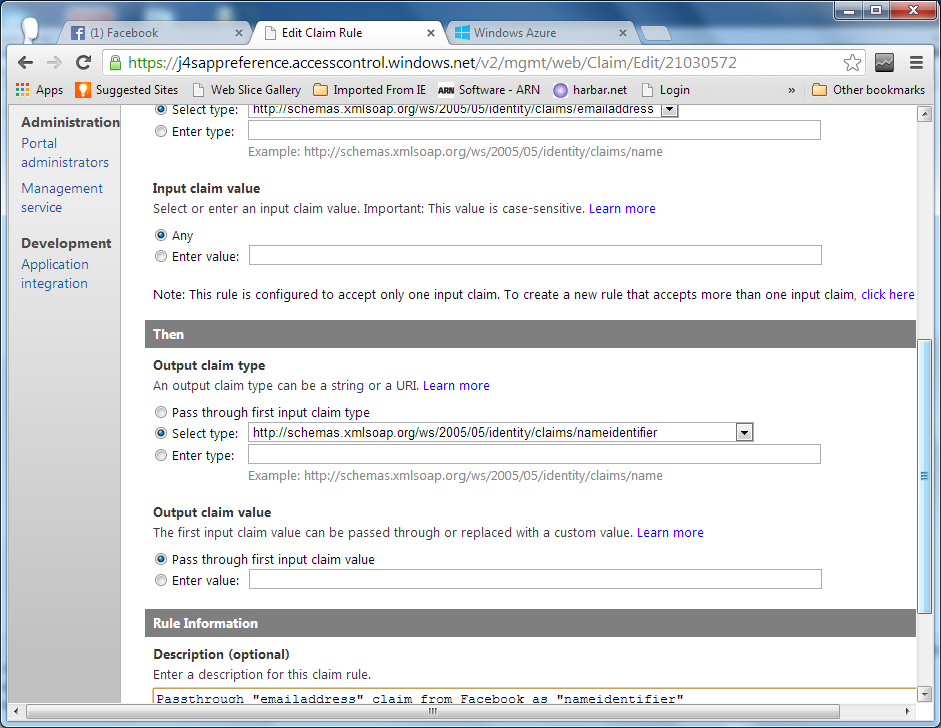
2.12. Below screen shows proper “input claim type” and “output claim type”
2.14. Click on Application Integration
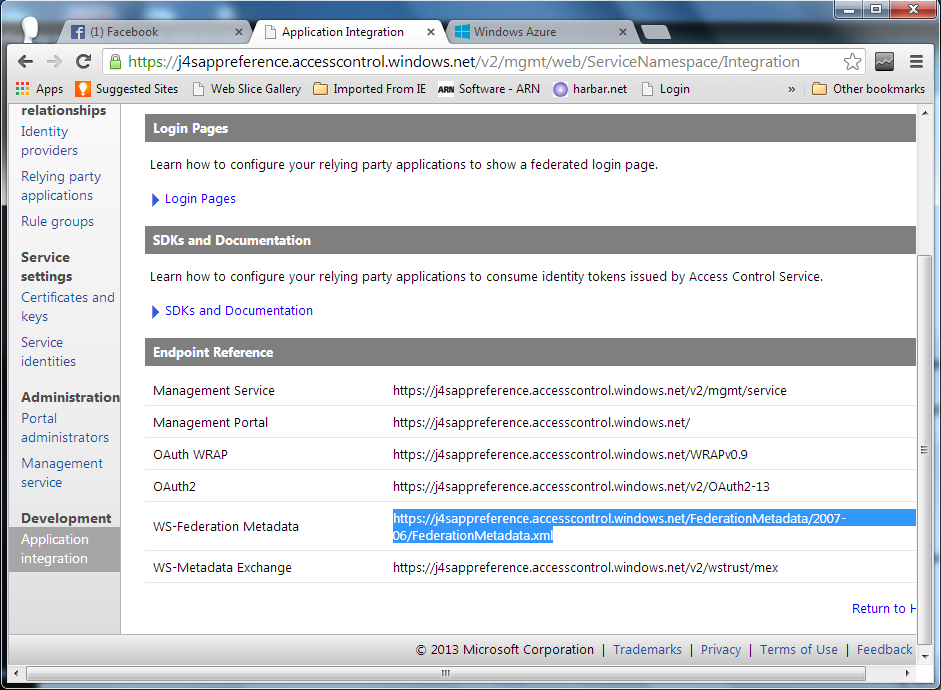
2.14. Copy WS-Federation Metadata End Point URL and paste on the browser
https://j4sappreference.accesscontrol.windows.net/FederationMetadata/2007-06/FederationMetadata.xml . You will see the xml of WS-Federation Metadata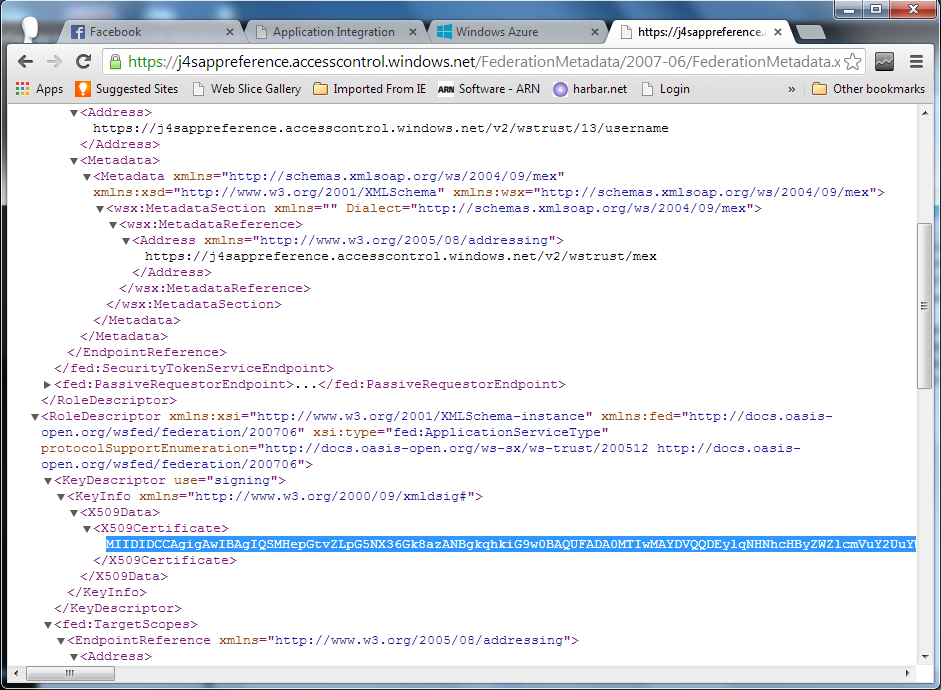
2.15. Save keyinfo as “.cer” file
<KeyInfo xmlns="http://www.w3.org/2000/09/xmldsig#">
<X509Data>
<X509Certificate>
// key info is what is found here
</X509Certificate>
</X509Data>
</KeyInfo>
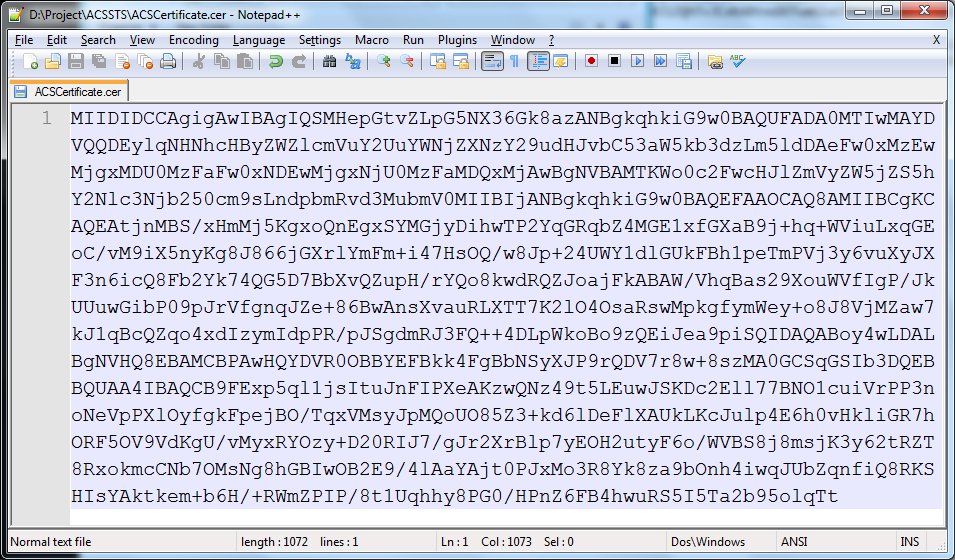
2.16 Save this file to your local drive. SharePoint should trust this certificate.
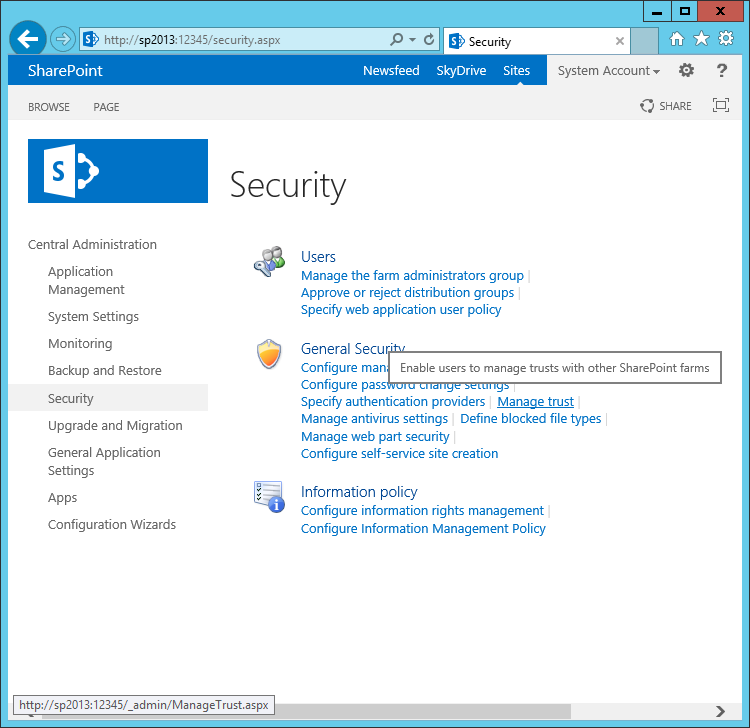
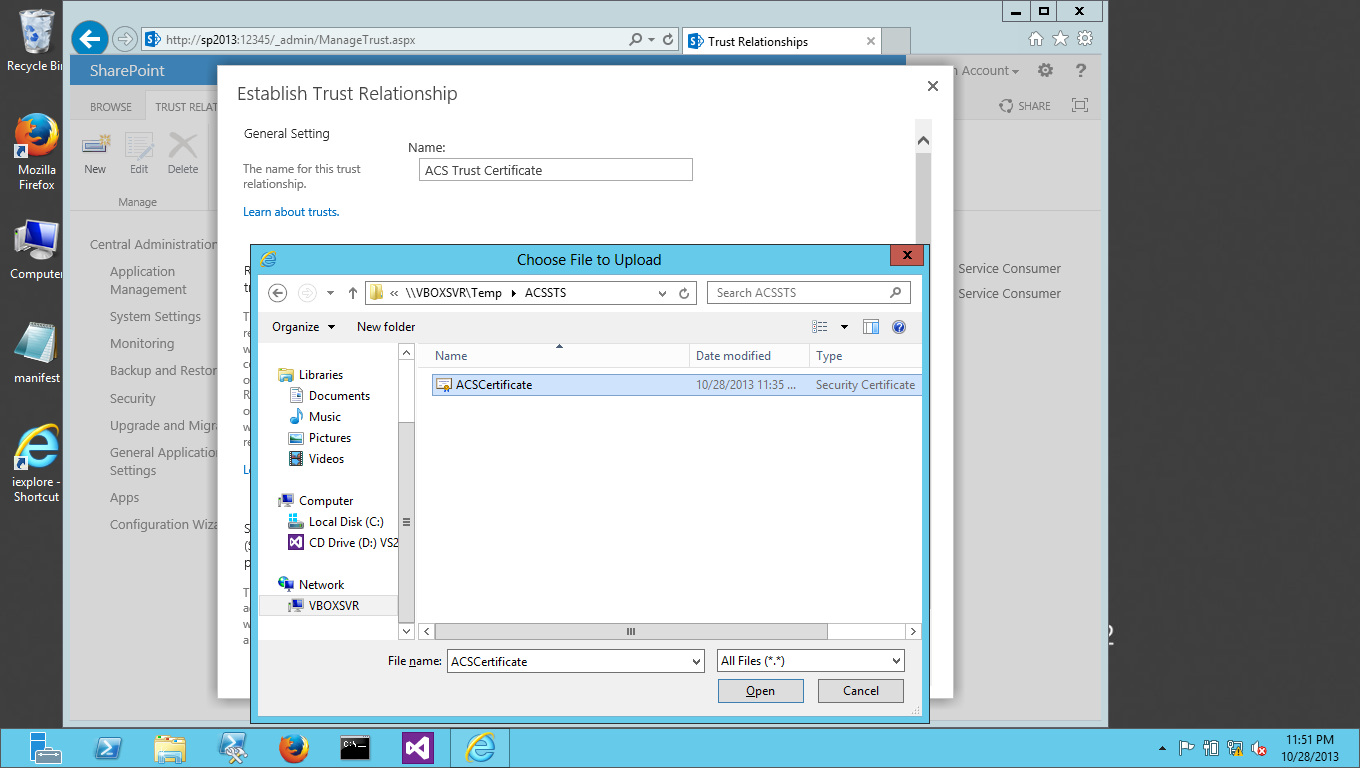
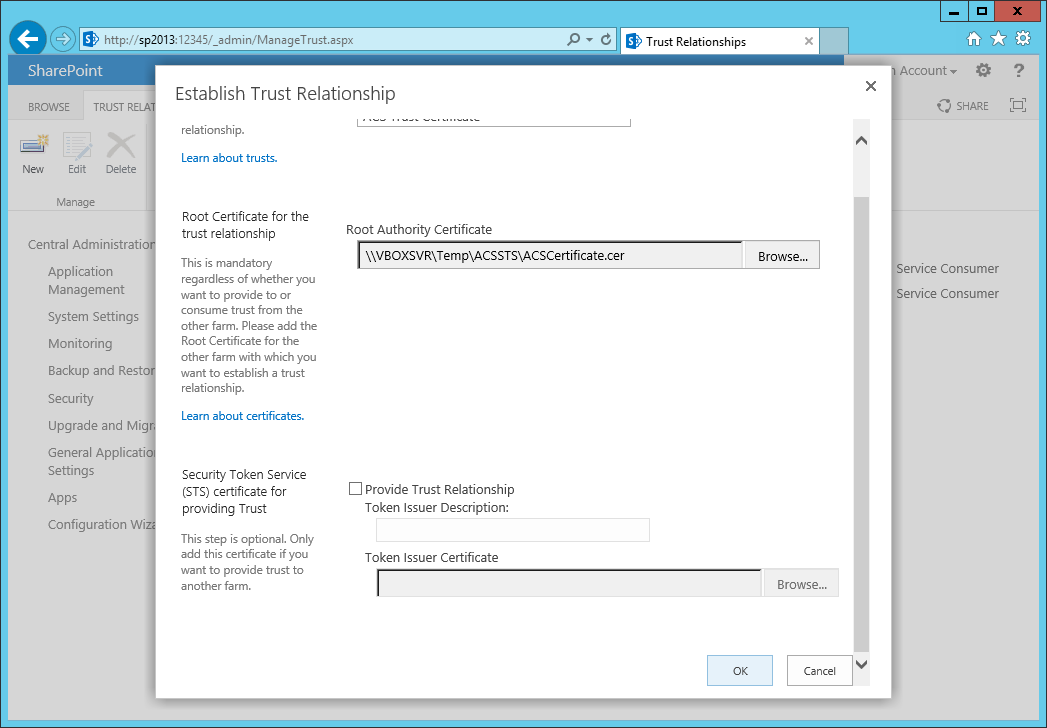
Step 3: Adding the Certificate in SharePoint
3.1 Go to CA => Security => Manage Trust
3.2 Upload the certificate to SharePoint
4. Create a new web application and need to register the same using PowerShell
Don’t forget to leave a comment if it helps you.
Think Big, Start Small
No comments:
Post a Comment